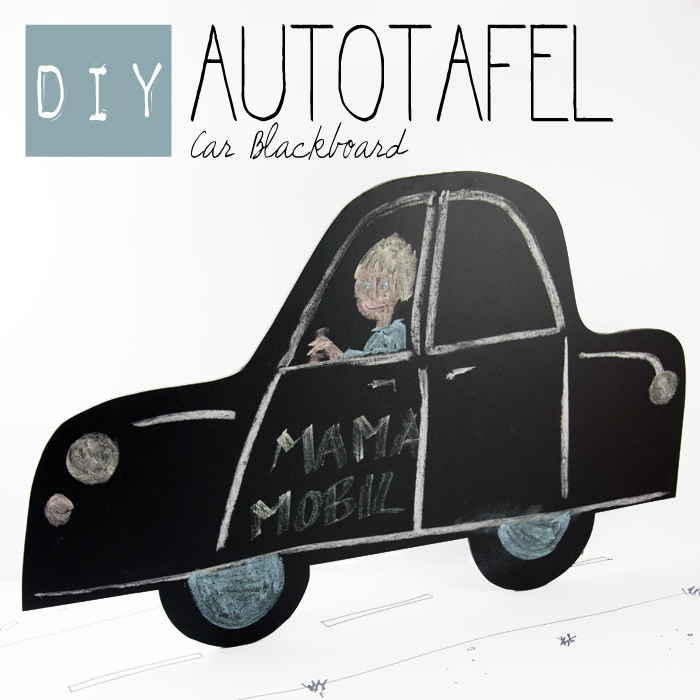
Früher gab es Tafeln bloß in der Schule und in der Gastronomie – eben dort, wo man schnell etwas aufschreiben oder malen und dann ebenso schnell wieder wegwischen musste. Heute sieht man Tafeln überall, zum Beispiel in Kinderzimmern oder Fluren. Manch einer malt sich sogar ganze Wände in Tafelfarbe an! Für das neue Zimmer meines Sohnes habe ich deshalb auch eine kleine Tafel entworfen – in Form eines Autos. Jetzt kann er sich jeden Tag aufs Neue daran austoben und sein Auto je nach Stimmung umgestalten.
Back in the days, you only saw blackboards in schools and in restaurants – in places where you sometimes quickly had to take notes or draw something and had to wipe it away just as quickly. Today, you can see blackboards everywhere, for example in children’s rooms or in corridors. Some people even cover whole walls with blackboard paint! For my son’s new room, I’ve also designed a small blackboard – in the form of a car. He can use it to be creative and re-design his “car” afresh every day, depending on his mood.
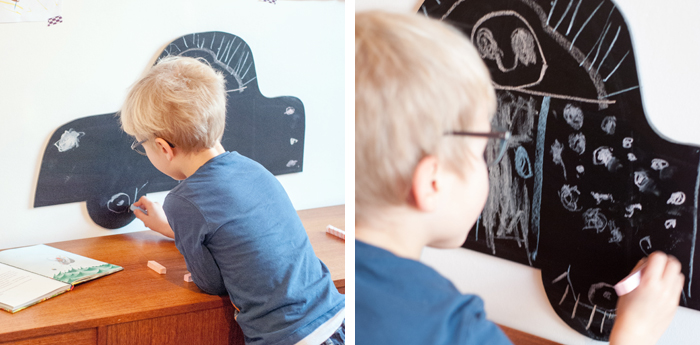
Diesen flotten Flitzer habe ich erst mal probegemalt – funktioniert prima und macht echt Spaß! Aber natürlich musste ich alles sofort wieder wegwischen – das Design entsprach wohl nicht ganz den Vorstellungen meines Sohnemanns… Seine Version ist dann auch gleich wesentlich fantasievoller ausgefallen!
Ich habe mit selbstklebender Tafelfolie und einer Leichtstoffplatte gearbeitet. So ist die Tafel sehr leicht und lässt sich einfach mit zwei Powerstrips an jeder gewünschten Stelle im Zimmer aufhängen. Du kannst die Form natürlich auch aus einem Holzbrett aussägen und mit Tafellack streichen – dann solltest du sie jedoch an einem festen Ort mit Schrauben und Dübeln an die Wand bringen.
First, I made a test drawing of the sporty scooter – it worked well and was a lot of fun! But of course, I had to wipe everything away right afterwards – it seemed like my design didn’t fully match what my son had imagined… It was no surprise that his version turned out to be way more fancy!
I worked with self-adhesive blackboard foil and a lightweight board. Like this, the board is light and you can easily hang it up at any place in the room, using only two powerstrips. Of course, you can also saw out the shape from a wooden board and paint it with blackboard paint – but then you’ll need to find a place where you can fix it on the wall with plugs and screws.
Das brauchst du:
- selbstklebende Tafelfolie
- 50 cm x 70 cm schwarze Leichtstoffplatte, Stärke mind. 10 mm
- Computer, Drucker, Druckerpapier DIN A4
- Klebeband
- Schere
- Bleistift
- Cutter & Schneidunterlage
- 2 Powerstrips
- Kreide
This is what you need:
- Self-adhesive blackboard foil
- 50 cm x 70 cm black lightweight board, thickness min. 10 mm
- Computer, printer, printing paper DIN A4
- Duct tape
- Scissors
- Pencil
- Box cutter & cutting board
- 2 Powerstrips
- Chalk
Und so wird es gemacht:
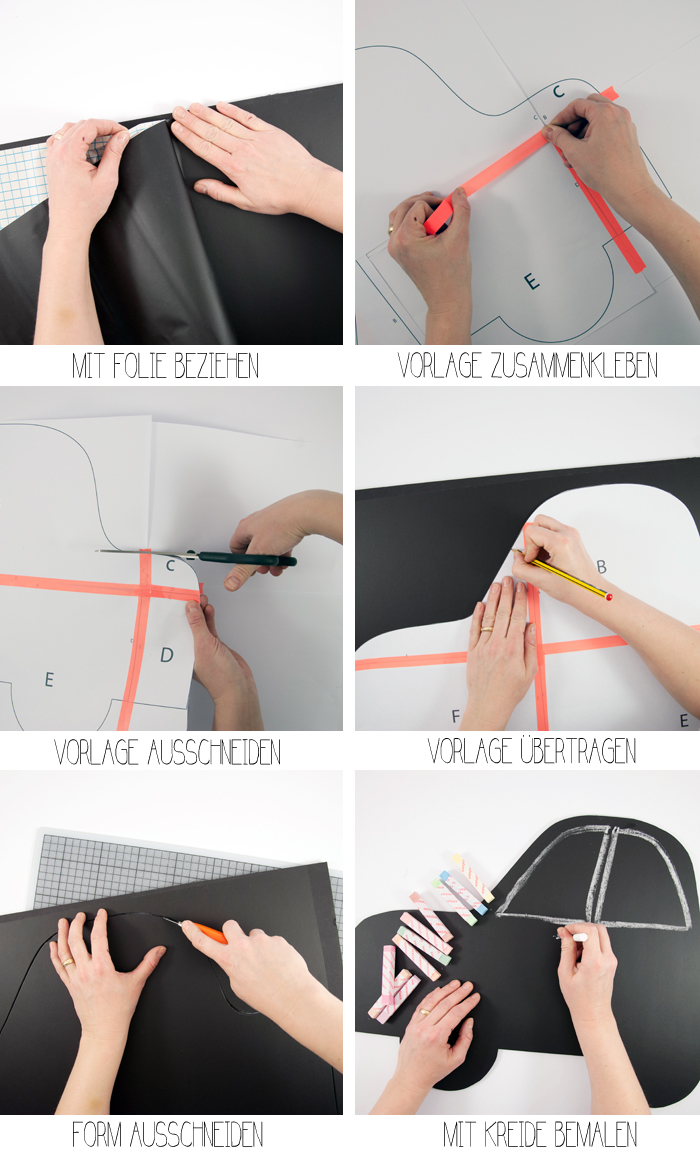
- Zuerst beziehst du die Leichtstoffplatte mit der Tafelfolie. Beginne dabei an einer Seite und ziehe nur ein kleines Stück der Schutzfolie ab. Lege die Folie vorsichtig auf und streiche immer von der Mitte aus nach außen die Folie fest. Achte dabei darauf, dass keine Luftblasen unter der Folie bleiben. Ziehe ein weiteres Stück Schutzfolie ab und arbeite vorsichtig weiter, bis die ganze Fläche bezogen ist.
- Drucke dir die PDF-Auto-Vorlage auf DIN A4 aus und klebe die einzelnen Teile mit Klebeband zu einer großen Form zusammen. Die kleinen Buchstaben an den Seitenkanten zeigen dir, welches Teil wo dran gehört.
- Schneide die Vorlage mit einer Schere aus.
- Lege die Vorlage auf deine Leichtstoffplatte und fixiere sie mit ein paar kleinen Klebebandstücken. Zeichne den Umriss mit einem Bleistift nach.
- Lege die Platte auf eine ausreichend große Schneideunterlage und schneide die Form vorsichtig mit dem Cutter-Messer aus. Enge Kurven musst du dabei extra langsam und in mehreren Etappen schneiden. Für ganz gerade Stellen kannst du ein Lineal zur Hilfe nehmen.
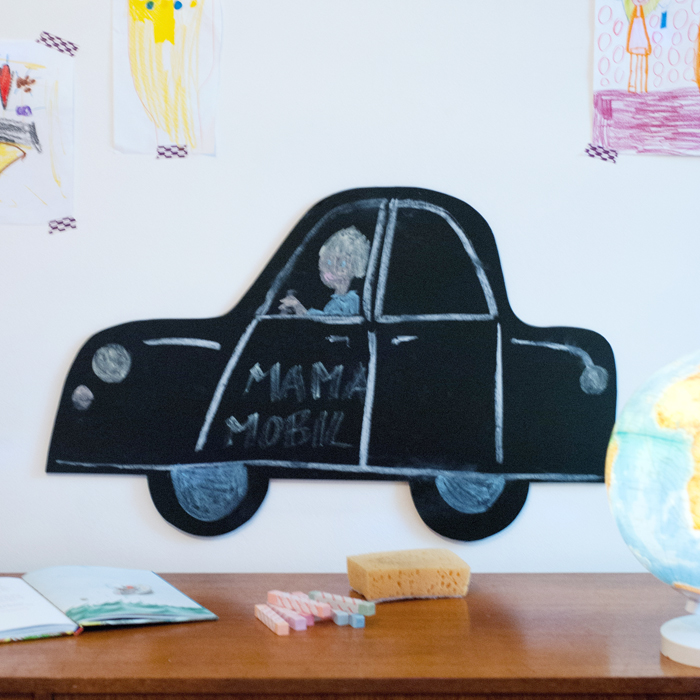
Nun ist die Tafel auch schon fertig! Hänge sie irgendwo hübsch auf und fange an, neue Autodesigns zu entwerfen 😉
And this is how it’s done:
- First, you have to cover the lightweight board with the blackboard foil. Start from one side and only remove a small part of the protective foil. Carefully apply the foil, always stroke from the middle outwards. Make sure there are no air bubbles under the foil. Remove another bit of the protective foil and carefully continue until the whole surface is covered.
- Print out the PDF-template in A4 format and put the pieces together with duct tape, to form one big shape. The small letters on the side edges indicate which piece belongs where.
- Use scissors to cut out the template.
- Put the template on the lightweight board and fix it with duct tape. Trace the outline with a pencil.
- Put the board on a cutting board that is big enough and use a box cutter to carefully cut out the shape. You might have to cut out sharp bends slowly and in several steps. You can use a ruler for the straight parts.
Now you’re almost done!Look for a nice place, hang it on the wall and start creating new car designs 😉
Ach ja, bevor ich es vergesse: Die Leichtstoffplatte ist natürlich empfindlich gegenüber Wasser. Deshalb solltest du die Tafel nicht zu feucht abwischen! Ein angefeuchtetes Schwammtuch eignet sich perfekt.
Hängt bei dir auch irgendwo eine Tafel? Wenn ja, wo und welche Form hat sie – und für welchen Zweck wird sie verwendet? Hach, was bin ich wieder neugierig, oder?
Oh, and before I forget: remember that the lightweight board is sensitive to water. So you have to be careful when you use a damp wipe! A lightly dampened sponge cloth is perfect.
Do you already have a blackboard somewhere? If so, where and which shape does it have and for what purpose do you use it? I know, I’m quite nosy, right?
Ich wünsche dir eine kreative Woche und falls du noch nach DIY Inspirationen zum Thema Auto/Volkswagen suchst, schaust du am besten mal auf dem Volkswagen Pinterest board „DIY Blogger for Volkswagen“ vorbei – da wird gerade fleißig gepinnt.
I’m wishing you a creative week and if you need more DIY inspiration on cars/Volkswagen, I recommend checking out the collaborative Pinterest board “DIY bloggers for Volkswagen” – you’ll find loads of inspiration on it!
Dieser Post ist in Zusammenarbeit mit Volkswagen entstanden und ist deshalb als ANZEIGE gekennzeichnet. Alle Ideen, Tutorials und Texte wurden von mir verfasst und spiegeln meine eigene, ehrliche Meinung wider. Was das angeht, bin ich nicht käuflich 😉
This post was created in cooperation with Volkswagen and is therefore labelled as an advert. I have created all ideas, tutorials and descriptions and they reflect my personal, honest opinion. For that matter, I‘m not for sale. 😉


Wirklich schön..
bisher hab ich immer auf Tafellack geschworen, aber die Folie ist ja gerade für so kleine Projekte wirklich sehr praktisch 🙂
Sollte ich auch mal ausprobieren 🙂
Viele liebe Grüße
Franzy
Ja, mit der Folie ist das Projekt echt ratzfatz umgesetzt. Aus Holz, mit Sägen, Schleifen und 2x Streichen dauert das schon ein bisschen länger 😉
GLG Johanna